Wednesday, December 05, 2007

New Photos

Here it is after all the work I've done recently:


I really like how the gaiters look.

I got the headlight stone guard for $10 on ebay...It came in a pair, in a dusty package. They were originally NOS 1970s rally car accessories. It was kind of tricky to mount -- they came with mounting clips for car headlight mounting brackets, not for motorcycles. I had to bend the clips to fit, but they were hardened so they would snap before they would deform. After snapping a couple of clips, I ended up heating them up with my MAP gas torch until they were red hot and let them cool slowly. They then bent easily. Then I heated them until they were red hot again and quenched them in water so they were hard enough to hold the stone guard on without deforming.

I think the stone guard and gaiters look pretty cool together.

Steering Head Bearing (Crossreference!)

I swapped out the roller steering head bearings with tapered roller bearings. It wasn't a very difficult job.

Surprisingly, the back of the bearing box contained a fitment chart. I thought I'd publish the info for anyone who might consider performing a fork swap on an XS 400 (like, um, Future Me).

Bikes with the same size steering head bearings as Yamaha SOHC XS400 bikes:
Suzuki
79-81 RM100, 79080 RM125, 79-80 RM250, 79-80 RM400
Yamaha
84-85 FJ600, 74-76 RD200, 73-75 RD250, 73-75 RD350, 76-79 RD400, 84-85 RZ350, 80-82 SR250 Exciter, 87 SRX250, 72-82 TZ250, 81-83 XJ550 Maxim, 81-83 XJ550 Seca, 76-77 XS360, 77-83 XS400 & Maxim, 82-83 XT550, 95-07 XV250, 88-90 XV250 Route 66, 83 XV550 Virago, 87-99 XV535 Virago, 83 YTM200 EK, 84 YTM200 EL, 85 YTM200 ERN, 83 YTM200K, 84 YTM200L, 85 YTM200N, 85-86 YTM225 Tri-moto, 83-84 YTM225 DXL, 86-90 YX600 Radian

I'm really stoked about getting it out on the road to see if all fo these changes have improved the handling.

Fuel Petcock

I got the universal fuel petcock I mentioned in a previous post from the local motorcycle shop for about $15. Unfortunately the universal mounting blank was a ridiculous $27. All it is a 1-inch by 3-inch by .25-inch, chrome plated, bronze bar with a 3/8 NPT threaded hole in the middle.

For $27, I can buy a bronze bar, a 3/8 NPT tap and matching 37/64" drill bit and have money left over. Plus, I'll be able to thread everything in the house to accept 3/8 NPT fittings >:-). I don't think I'll be too sad if my fuel petcock mounting bracket isn't chrome plated.

Right now my bike is out of commission with the fuel tap off...it was surprisingly nerve wracking to run the tank completely out of fuel. I'd like to actually fix the petcock before I fill it with fuel again.

Bronze swing arm bearings

I installed the bronze swing arm bushings. The parts from Mike's XS were a perfect fit and easy to install. I can't wait to take it out and see if they made a difference!

I'm glad that Mike's XS is around!

Oil Leak Fixed

I had a mysterious oil leak from behind the left engine cover, but I couldn't figure out where it was coming from. I finally removed the cover, chain, and sprocket, coated the side of the engine in baby powder, and fired it up. It became clear pretty quickly that the oil was leaking from the output shaft seal:


I ordered a new seal from Bike Bandit for $7.50 and installed it. The old seal got damaged from the removal, and the new seal was pretty stubborn about going in. I got it in in the end, though.

Hopefully I won't "mark my territory" whenever I park for multiple hours now!

Fork Oil Change

I changed the fork oil a few weeks ago and installed some fork gaiters.

I had to pull the fork legs to put the gaiters on, but it really wasn't a big job. However, with the fork legs removed from the bike, I had a hard time getting the fork springs out.

To remove the fork springs, you have to compress a cap in the top of the fork and remove an internal circlip that holds the spring in.

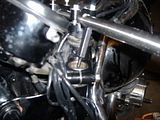
The problem was, it took a fair amount of force to compress the cap, and I had a really hard time figuring out how to keep the cap compressed while I pried out the circlip, working solo. Finally I ended up doing it by putting the fork legs back on the bike, removing the handle bars, putting my beat up "garage broom" through extremely loose handle bar clamps, wedging a tool (a 12-point internal wrench in this case) between the broom handle and the fork cap, and slowly tightening the handle bar clamps until the cap was compressed. The pictures below might help explain better (click for a larger view):


Farther Away

Closeup


After doing that, the rest of the procedure was easy. I can't wait to take it out and see if it made any difference.

Shock Update

My Harley shocks arrived. They are the right length, but they don't fit because the eyelets are too wide (if measured perpendicular to the diameter). I tried to show what I mean in the picture, but it's kind of hard to see (click for a larger version):


This is problematic on the bottom because the shock is held on by a stud, which isn't long enough to stick through the shock eyelet and thread a nut on...but the stud should be replaceable...the real problem is at the top, because the top of the shock fits into a metal pocket in the frame, and the new shock's eyelet is too wide to fit in the pocket.

I still haven't decided if it would be better to sell she shocks and get something more appropriate, or if I should try grinding down the eyelet width...I'm not crazy about either idea. In the mean time, the shocks are sitting in my garage.